Instructions for beginners
Our webmail gives you the ability to create high-quality email filters. With a set filter, you can block spam and other unwanted messages. You can also download your filter settings and apply them to other email addresses in other email clients.
1. Log in to webmail.websupport.se.
2. Click Settings on the left.
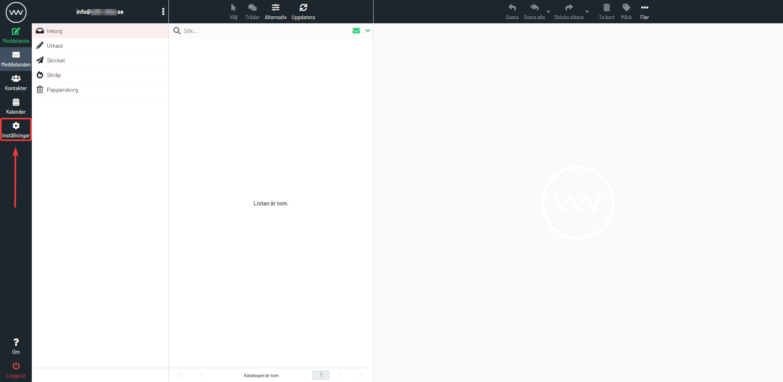
3. Select “Filters” from the left menu that appears.

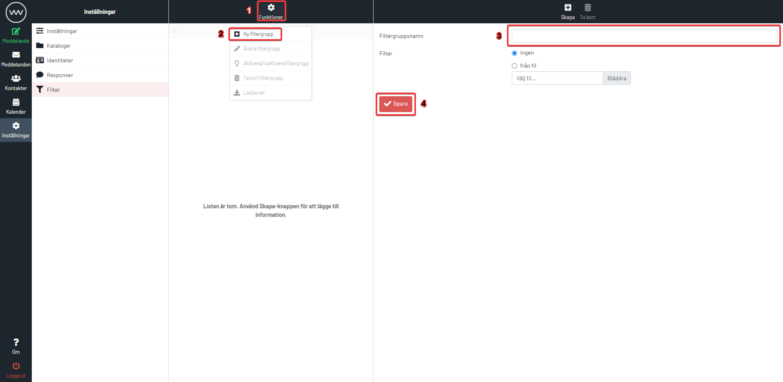
Here you can choose between Filter sets and Filters. First create a filter group by clicking Actions → New filter group. Then fill in a Filter group name and select “Save”
If you’ve created filters before, they’re available in a filter package called Manageive. We advise against deleting it.
Standard filters
1. Auto-replies
To set up an auto-reply, create a filter as shown below.
Fill in the filter name (A). Select the option “Filter all messages” (B). Select the option “Reply to message” (C). Fill in the message text you want to reply with and the subject of the email. Finally, select Save.
The filter above will send the preset message as a reply to all incoming email.

2. Anti-spam filter
If you’re getting a lot of spam, the filter below is a good measure.
Fill in the filter name A). For incoming messages, select the option “Filter on all following rules” (standard). Set “Subject” and “contains” (B). In “Perform these actions”, select the option “Move message to spam” (C) or another action if you prefer. Finally, click Save.