In this longer guide, we’re going to go through how you’ll get started with your services at Websupport. Everything from connecting your first domain to creating email addresses and websites with the help of our automatic installer. This guide is going to finish with a WordPress installation, but you can follow this guide ass well even if you want to install another CMS.
Connect a domain to a service/hosting
Depending on whether the domain is already with us, there will be slightly different approaches. We start with information for if the domain is not yet with us.
1. log in to the Administration Panel.
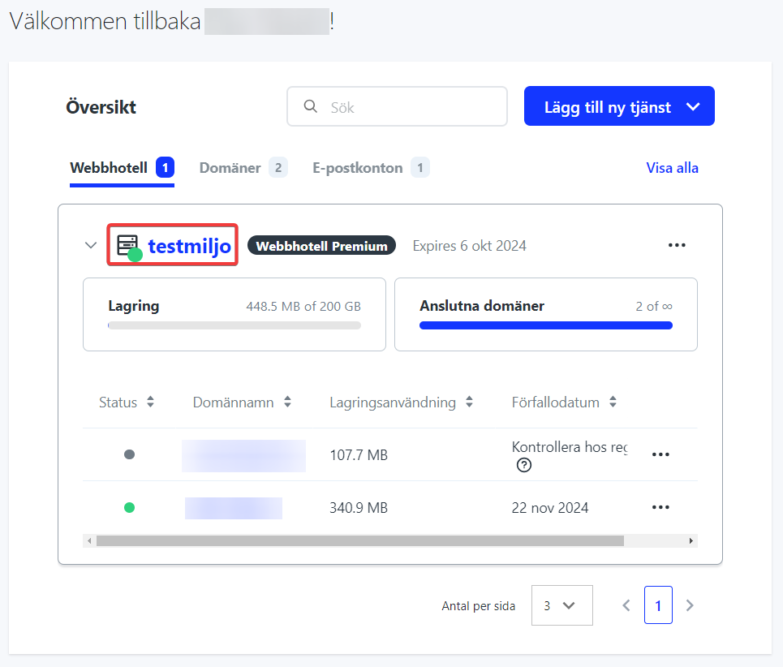
2. click on the web hosting name in the overview (by default, it is the name based on your username)
3. Click on “Add” under “Linked domain names”
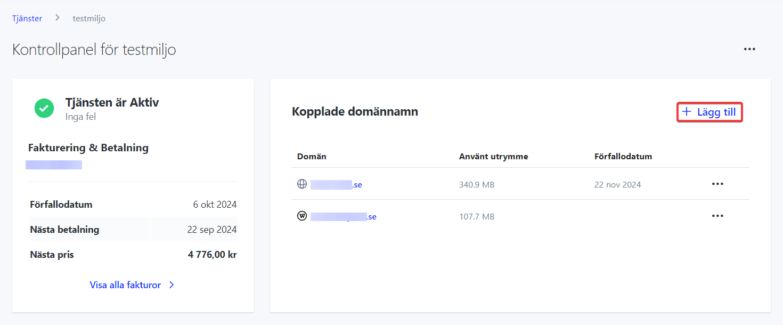
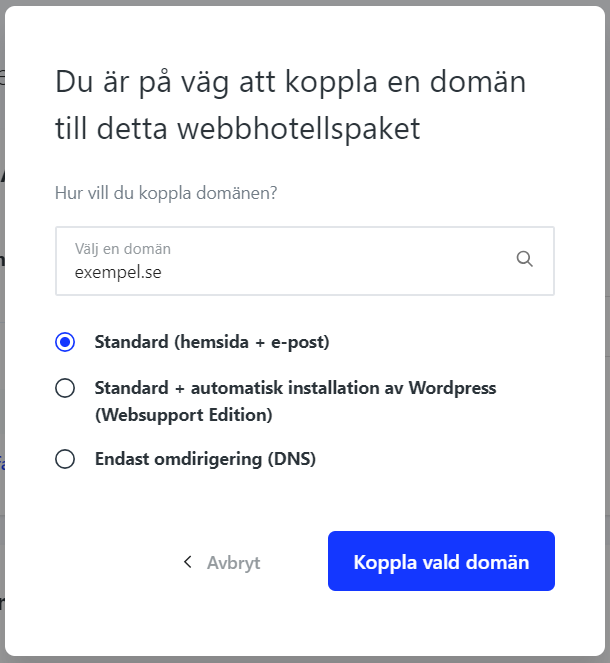
4. Then enter the domain name and the type of service you want to use.
“Standard” opened up the possibility to install any website tool and to create e-mail addresses.
“Standard + automatic installation of WordPress” installs WordPress on the site when the services are created. Of course, you can also create e-mail addresses here.
“Redirection only” should be used if you only need email from us, or if you only need to use DNS for the domain.
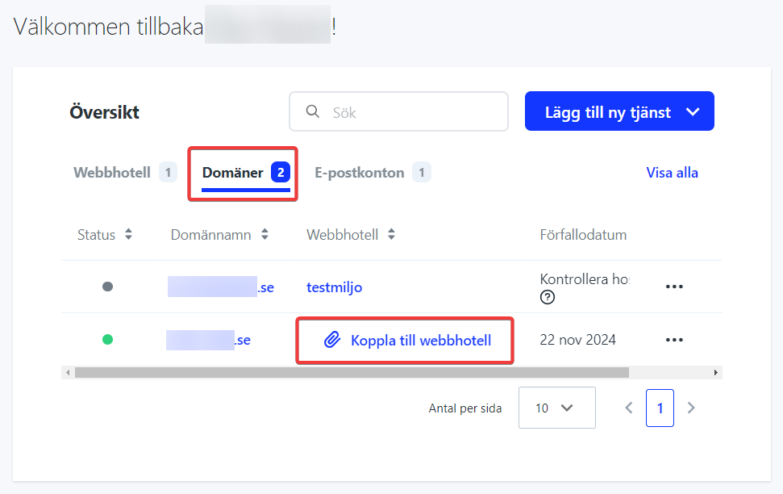
If you already have a domain with us but do not have any services linked to it, follow the steps below.
1. in the service overview, click on the “Domains” tab and then “Connect to hosting”.
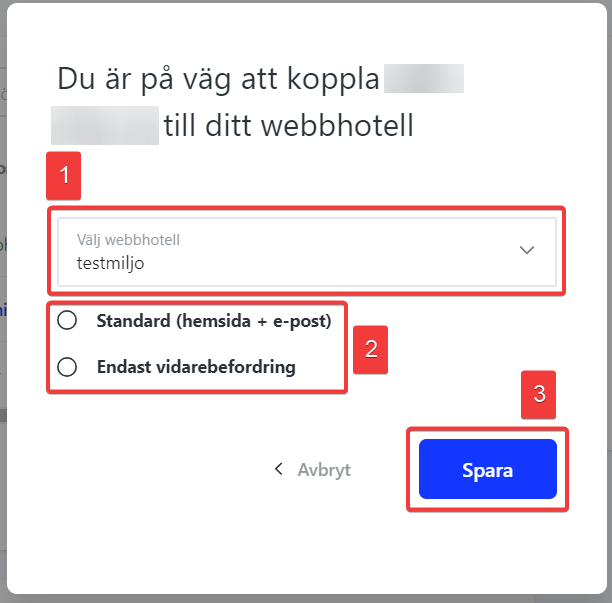
2. Next, select your web host and then the type of service you want to use. Then click “Save”.
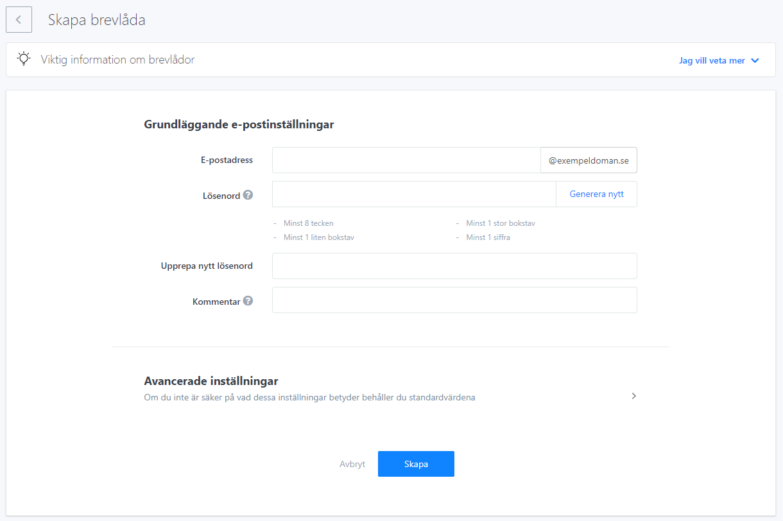
Create email account
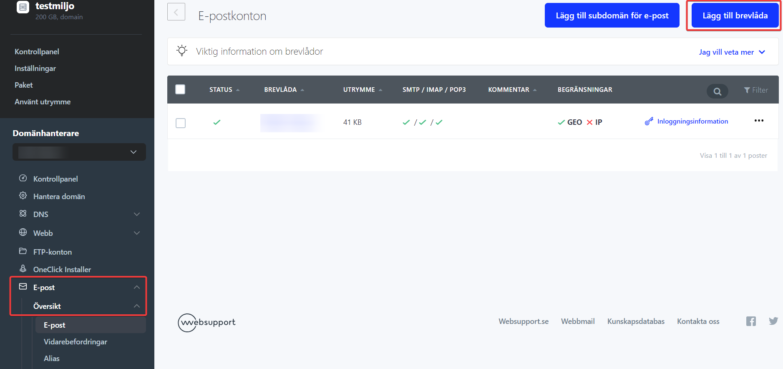
1. Click the domain name in your service list.
2. Click “Emails” in the menu to the left, then click “List”.
3. Click “Add mailbox” in the top right.
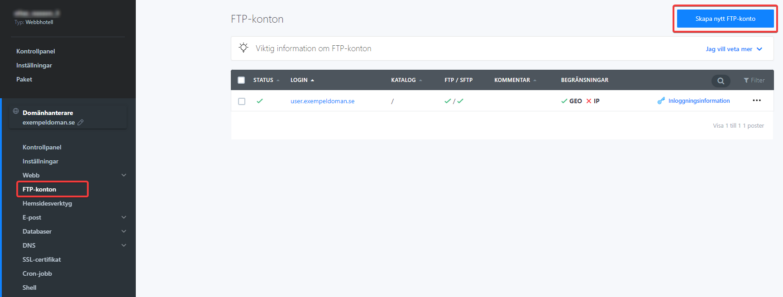
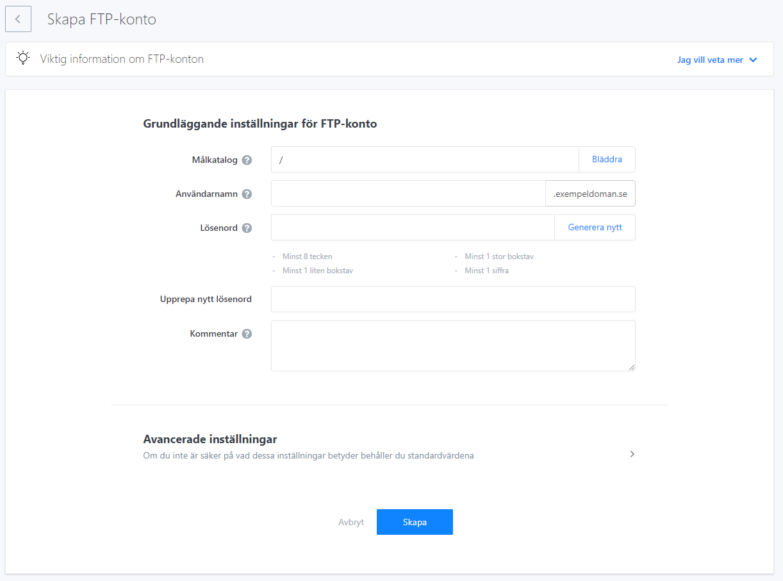
Create an FTP account
1. Click the domain name in your service list.
2. Click “FTP accounts” in the menu to the left
3. Click “Create new FTP account” in the top right.
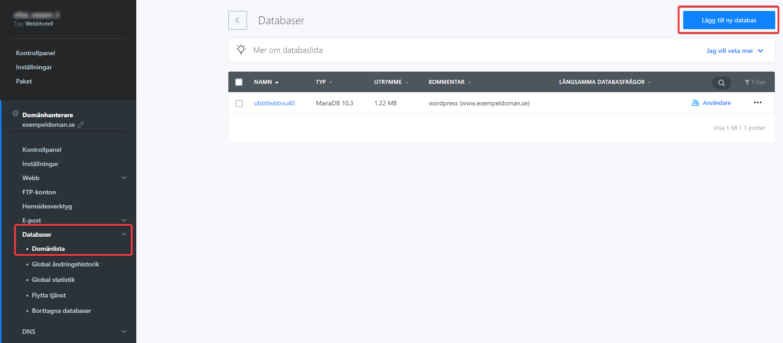
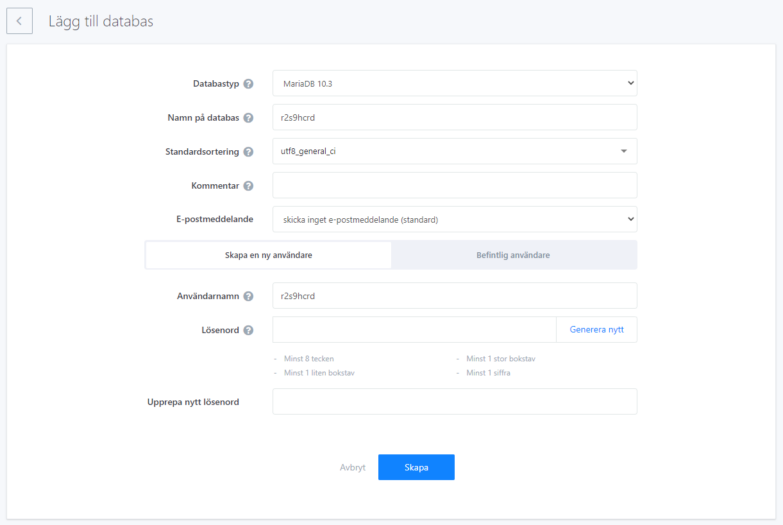
Create a database
1. Click the domain name in your service list.
2. Click “Databases” in the menu to the left, then click “List”
3. Click “Add new database” in the top right corner
Please note that you do not need to create a database this way if you plan to install a CMS via our automatic installer. The installer will take care of that itself.
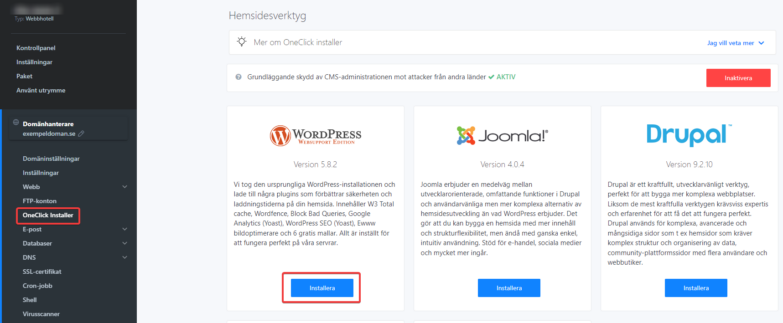
Install a CMS
1. Click the domain name in your service list.
2. Click “Website tool” in the menu to the left.
3. Select desired CMS and click “Install”.
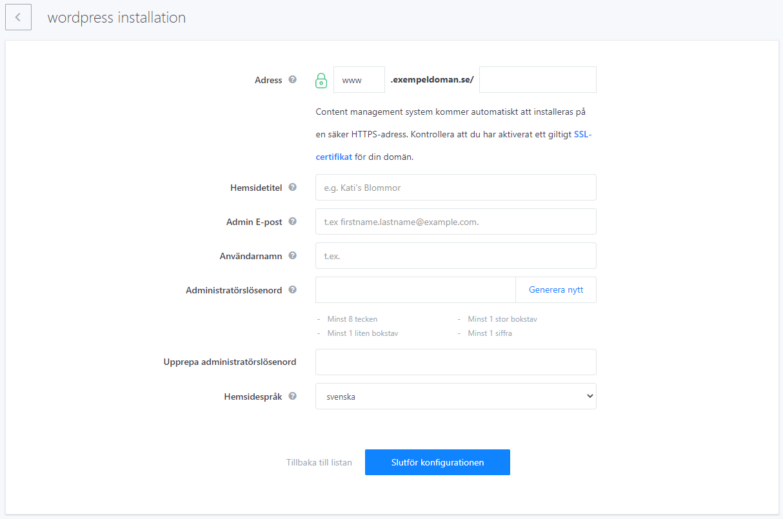
4. Enter the desired information in the required fields and click “Install”
5. The installation will be completed within 15 minutes.