Why do I need to block cookies?
The General Data Protection Regulation (GDPR) requires websites to obtain informed consent from users before using cookies that are not necessary for the website’s basic functionality. This is known as Prior Blocking, and it ensures that users have control over their personal data by allowing them to choose whether to allow non-essential cookies on their devices.
It is an important step in protecting user privacy and complying with data protection laws.
In this article, you’ll learn how to set up Prior Blocking with Google Tag Manager and how to add a new tag that only fires when a visitor has accepted cookies via your Cookie & GDPR Manager (iubenda) cookie banner.
Note: To follow this guide, you need to have already created a Google account and set up Google Tag Manager. If you haven’t done this yet, Google provides helpful guides:
If you are trying to install Cookie & GDPR Manager (iubenda) on your WordPress website, please follow this guide instead.
What is Google Tag Manager?
Google Tag Manager is a tool that helps website owners manage and control various tracking codes and scripts on their website. It simplifies the process of adding and updating code snippets such as tracking pixels, analytics tags, or advertising tags.
What is a tag?
A tag is a small piece of code placed on your website pages to collect valuable information about visitor actions. This data is then sent to tools like Google Analytics to help you understand user behavior and make informed decisions.
How to add a new Tag
In this example, we will setup a tag for Google Analytics 4 tracking, but you can follow the same process for any tag that you might need to use on your website.
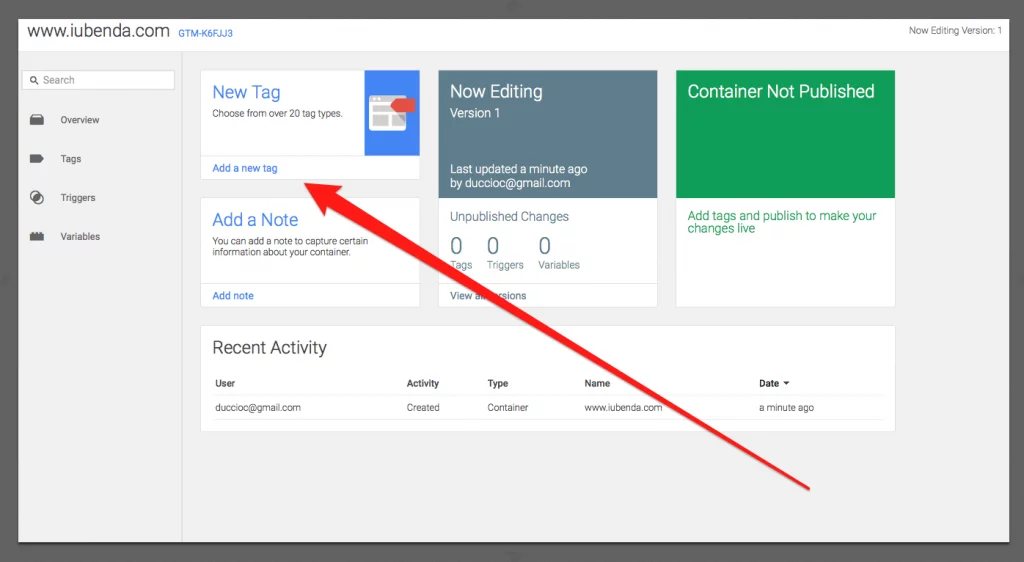
Firstly, log in to your Google Tag Manager dashboard and click ‘Add a new tag’
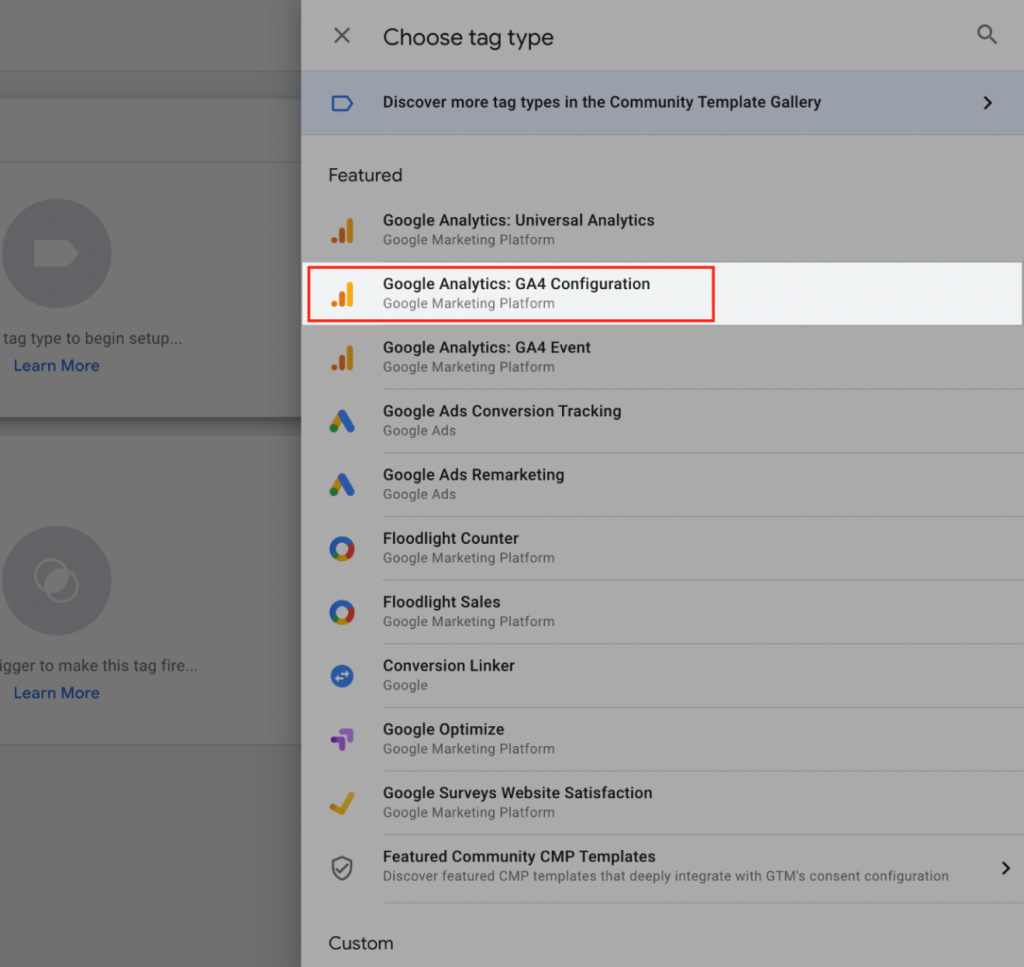
Click on the Tag configuration window as seen in the image below:

Select the tag you want to setup. For this example, we are adding Google Analytics: GA4 Configuration.
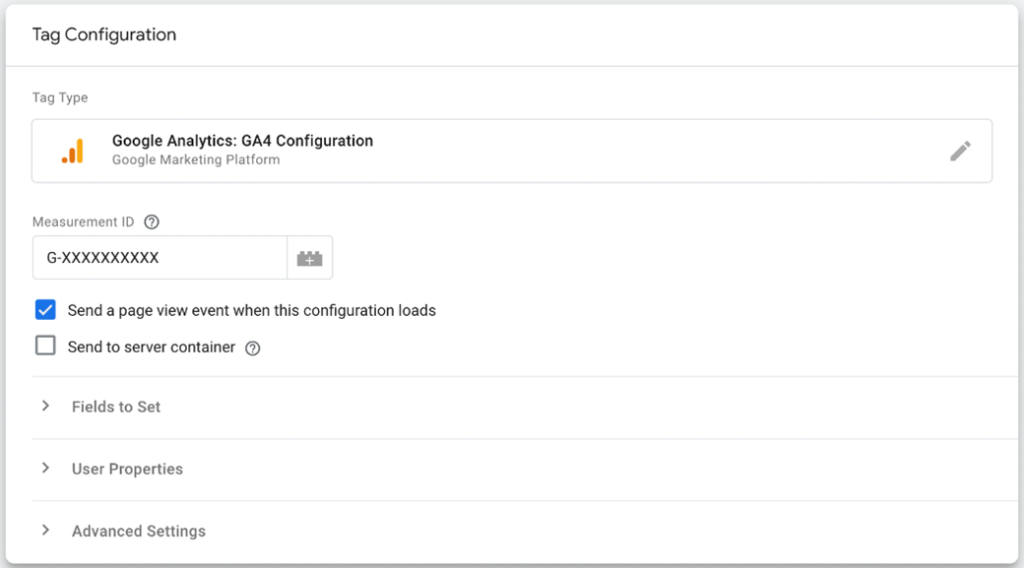
Configure the tag
You will now need to enter the necessary details into the Tag Configuration screen.
In this example we need to add the Measurement ID (e.g, G-A2ABC2ABCD) for our GA4 property (available once you have setup your website in Google Analytics), then we click the blue ‘Save’ button.
Adding triggers
Now that we have setup the tag, we must set these triggers that will allow the tag to activate and the visitor’s activities on our site to be tracked:
iubenda_consent_given
iubenda_preference_not_needed
Advanced Setup: If you’ve enabled the per-category consent feature on your Privacy Controls and Cookie Solution, instead of the iubenda_consent_given event, you’ll have to create a custom event for each purpose you display on your cookie banner/policy (with the exception of the “Necessary” purpose). More information on setting those triggers up can be found here.
If you’re implementing Google Consent Mode, skip this step and jump to the installation guide.
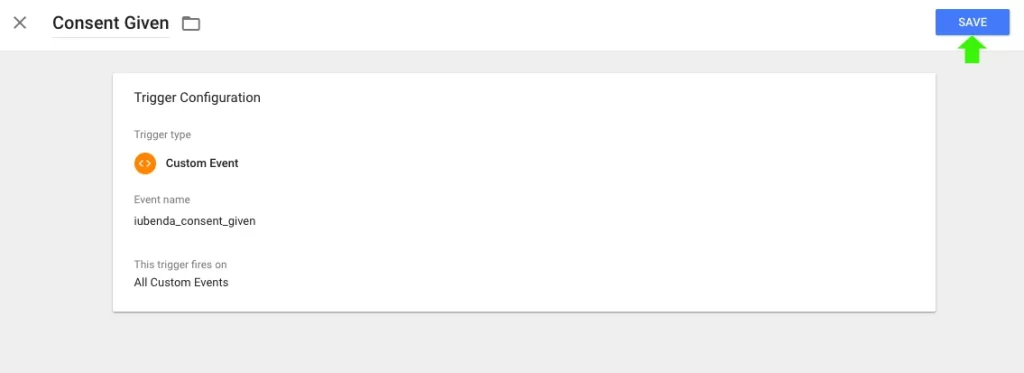
Add the iubenda_consent_given trigger
Click on the “Triggering” section below:

Then click on the little plus sign on the top right to add a new Trigger. Now, in the trigger configuration window, select Custom Event (quick note here: please be sure NOT to select “All Pages” as a trigger).
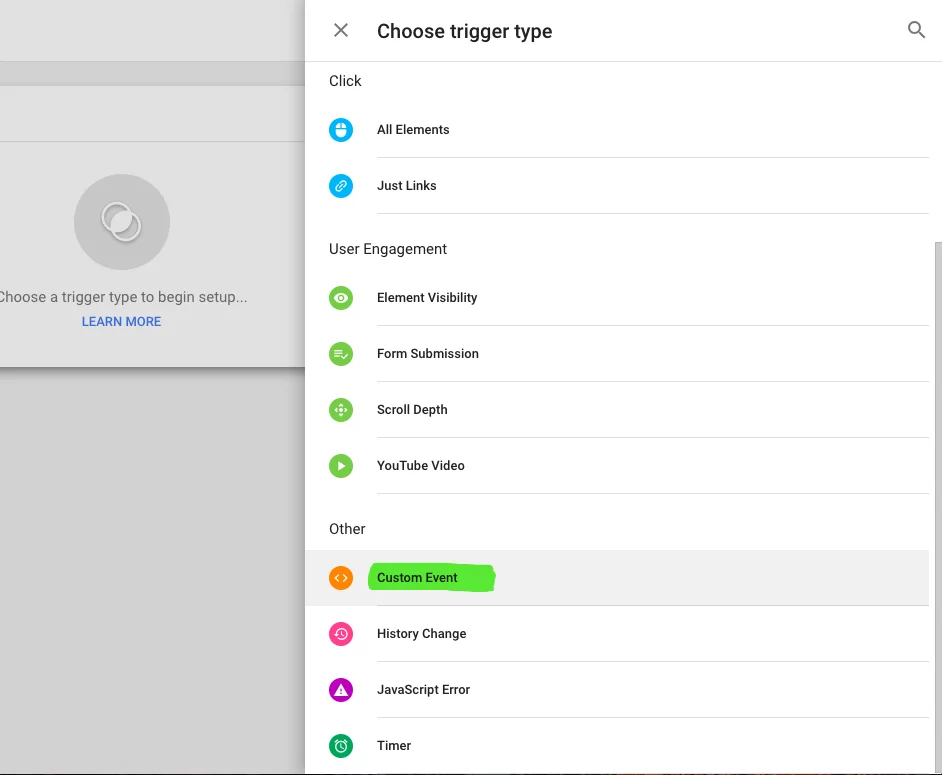
For event name please input the following value: iubenda_consent_given. This will activate the trigger on All Custom Events labelled Consent Given.
Save the trigger by clicking on ‘Save‘.
Add the iubenda_preference_not_needed trigger
Follow the same steps to create another trigger called iubenda_preference_not_needed, that fires whenever a preference is not needed (for example when GDPR does not apply or the user is based outside the EU).

Note: If the CCPA applies to you, you will need to add an exception rule, to disable the relevant cookies when the user opts out. More information on setting up that trigger can be found here
Now that the triggers have been added, your Google Analytics: GA4 Configuration tag will look like this:
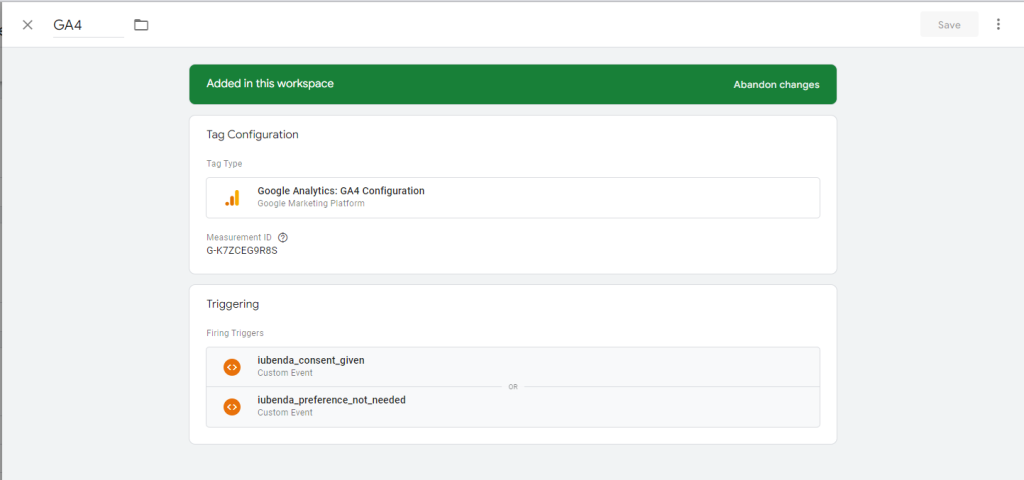
Click on ‘Save’ to save the new tag.
The previous example assumes that you’re firing the tag on all pages of your site, if you’d like to have a tag fire on just one page (eg. Shopping Cart page) see the advanced section here.
Summary
Now that you have completed all the steps in this guide, you have setup Prior Blocking and created a tag for Google Analytics 4, that will only activate when:
- The visitor has agreed to the use of cookies
- GDPR does not apply to the visitor or they are based outside of the EU.
Next Steps
If there are any additional tags that you need to create, follow this process again to add the new tag to your Google Tag Manager dashboard.
Once you have setup all of your tags, your next step will be to install the iuebenda Privacy Controls and Cookie Solution on your website, so that visitors can accept or reject cookies. We have a guide to take you through that process that is available here