
Instructions for beginners
Every domain needs at least two name servers to work. You specify the name servers for the provider or service where you make DNS changes. You always change name servers at your registrar—the company that renews and manages your domain. All other DNS records depend on the name servers.
Change name servers
1. Log in to Control Panel »
2. Click your domain in your services list.
3. In the left menu, select DNS and click Name servers.
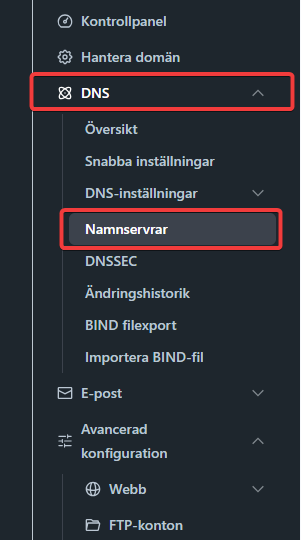
When you click Name servers, you see your domain’s current name servers. Editing name servers lets you use the ones you want. Keep in mind this can take up to 48 hours to take effect across the internet.
        <div class="hts-messages hts-messages--danger  hts-messages--withtitle hts-messages--withicon "   >
            <span class="hts-messages__title">If you change from our name servers to another company's name servers, you lose the ability to manage other DNS records in our control panel — for example A, MX, CNAME, or TXT records.</span>
        </div><!-- /.ht-shortcodes-messages -->
Name server change form
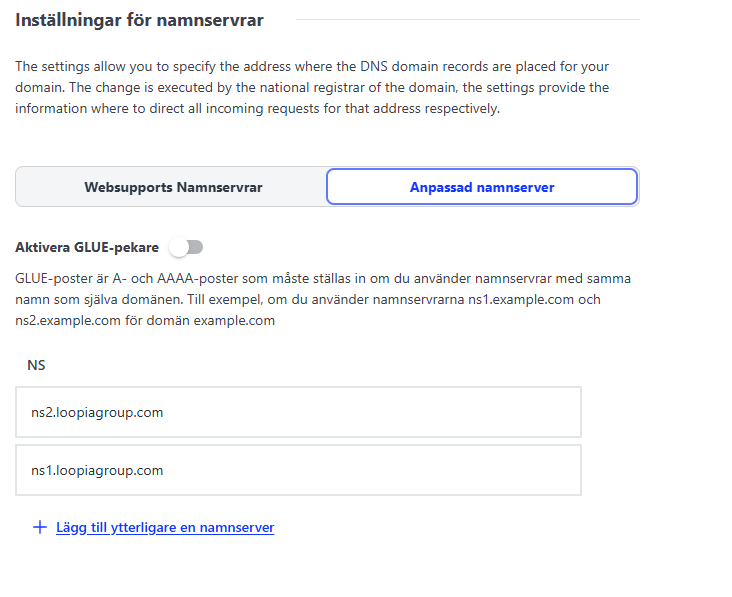
To use WebSupport name servers, enter ns1.loopiagroup.com and ns2.loopiagroup.com. If you don’t want WebSupport to manage your domain’s DNS settings, select Use custom DNS servers and enter your custom DNS server addresses in NS1–NS6.
        <div class="hts-messages hts-messages--alert  hts-messages--withtitle hts-messages--withicon "   >
            <span class="hts-messages__title">Keep in mind that a name server change can take up to 48 hours to take effect.</span>
        </div><!-- /.ht-shortcodes-messages -->
