SSL certificates protect your entire domain, including your subdomains, and enable smooth operation of the website via HTTPS, such as https://www.websupport.se. An easy way to ensure if your domain is SSL certified is to check via the “padlock symbol” at the far left of your URL field.
Automatic activation
The automatic installation starts when your hosting is activated.
The requirement for automatic installation is that the domain is in our DNS zone. A newly registered domain can take up to 24 hours before the DNS is in place and later also your SSL certificate.
Manual activation
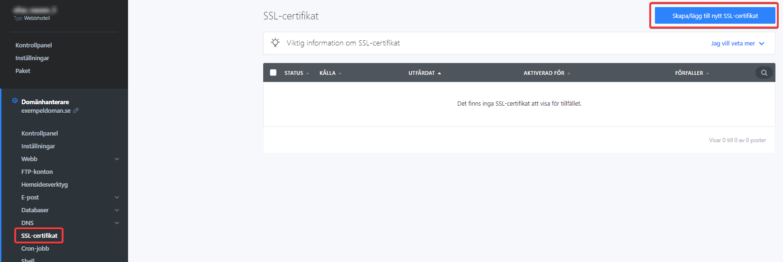
Manual activation of your SSL certificate is done via our control panel.
- Log in to the control panel and select the domain in question from your list of services.
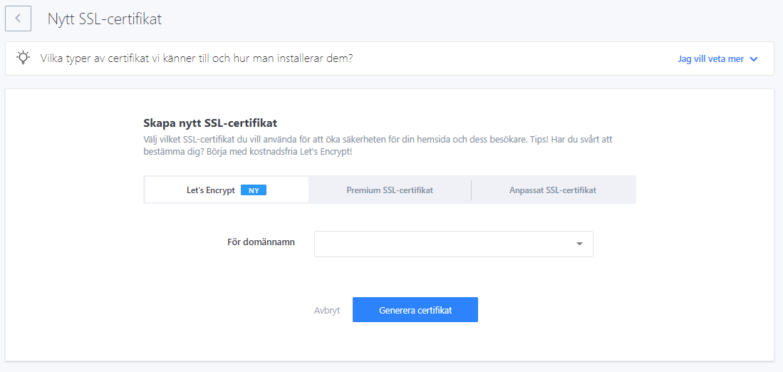
- Navigate to SSL in the left menu and select Add.
- Select the desired type of SSL certificate and enter the address/addresses to which it will be applied.
Requirements for activating Let’s Encrypt
- To enable Let’s Encrypt SSL, the domain must point to us with DNS. If you use another web host for your website, the SSL certificate is activated there.
- Let’s Encrypt SSL certificates generated by us are normally maintenance-free. They are renewed automatically – before the end of their validity (90 days).
- The certificate can only be used for the domain it was activated. But of course, you can activate more certificates on another domain.